

Winter's Wide View
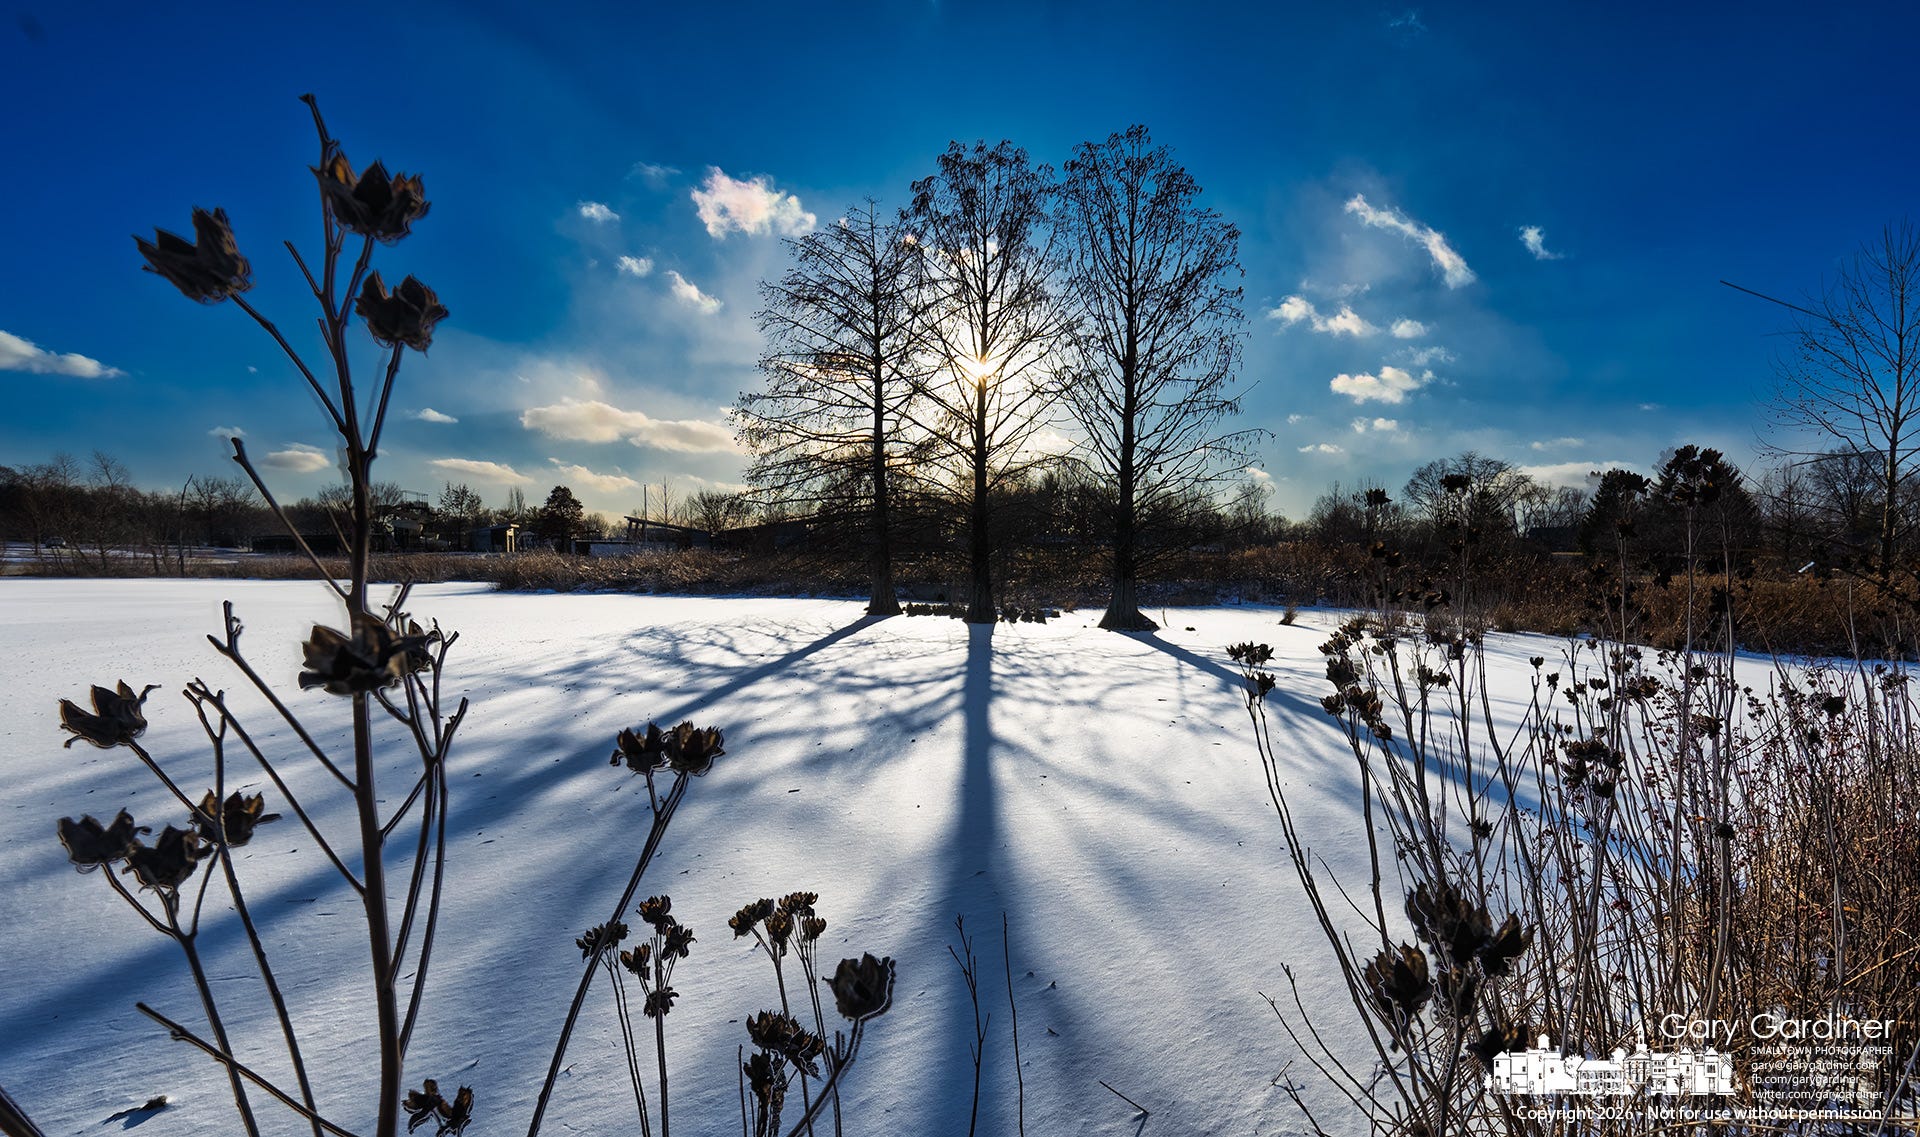
When I see a winter scene like this, I take my time before picking up the camera. Snow makes things look simple, but it also shows any mistakes. There’s no way to hide poor composition or bad lighting. My first step is to pause and look for structure. Here, the trees form the backbone of the photo. They stand close together, evenly spaced, and already create a sense of balance. I make sure to position myself so the trees anchor the frame as the main subject, not just as background.
I watch the sun carefully. Shooting into the sun can be tricky, but winter light is softer and lower, so it can work if you plan ahead. I wait until the sun is shining through the trees. This helps control glare and still gives long shadows. I use those shadows on purpose—they guide the viewer’s eye across the snow toward the trees. I line them up so they lead into the frame, not out of it.
Since the brightness range is so wide, I use a five-frame HDR sequence. I take one shot at what I think is the best exposure, then two brighter and two darker, each two stops apart. This way, I capture details from the bright sun to the dark shadows in the foreground. I take my time with this step. Any movement between shots will make blending harder later, so I keep the camera steady and wait for the scene to be still.
Foreground is important, especially in snowy landscapes. Without it, the scene can look flat and empty. I look for dried plants or seed heads protruding from the snow and place them near the lens, usually to the sides. I use a small aperture so they stay clear, but I make sure they don’t take attention away from the trees. These elements add depth and scale, not drama.
Relying only on metering won’t work here. Snow can make your camera underexpose, while the sun can cause blown highlights. Bracketing helps, but I also watch the histogram closely. I aim for clean whites without losing detail, and I want to keep details in the darkest shadows too. HDR isn’t about making things look extreme. It’s about keeping what I saw, even if the camera can’t capture it all in one shot.
I make sure the camera is level and pay close attention to the vertical tree trunks. Even a small tilt can weaken the photo. I also watch where I place the horizon, keeping it low enough to show the sky but only if it adds something to the image. Winter skies often have a soft texture that balances the snow below.
Timing is important. As the sun gets lower, the shadows grow longer and spread out, changing how the snow looks. I keep shooting as the light changes, rather than assuming the first shots are the best. Often, the best photo comes after the light has shifted and the shapes stand out more clearly.
When editing, I carefully blend the five exposures. My goal is a natural look, not an obvious HDR effect. I keep the snow looking cold and don’t add warmth just because the sun is in the shot. I add contrast gently so the shadows stay clear without getting lost. If the editing stands out too much, I know I’ve overdone it.
If you find a scene like this, let winter help you. Use soft light, long shadows, and careful bracketing to manage brightness levels. Build your photo step by step, from the foreground to the background. Most importantly, be patient and don’t overdo it. Snow looks best when you approach it calmly and take your time.

PhotoCamp Daily isn’t about the technical skills needed to be a good photographer or a photojournalist. There are numerous resources available, including videos, self-help books, training courses, and classes, as well as the power of social media as a learning tool.
PhotoCamp Daily focuses on learning to experience the process of creating good photos, observing subjects, and their connection to storytelling. It’s about learning to express yourself more effectively, shaping a shared understanding of your world, and embracing the new experiences you encounter.
PhotoCamp Daily is always free! But you can pledge support at any time.
